I've love my morning chores when the weather is nice. This morning its not exactly totally sunny, but there is enough clearing of the clouds to give me a beautiful dawn. It's also above freezing, 35 degrees, which also makes it nice.
The cattle are so happy to see me. The four little heifers run for the barn as soon as I step out the door. They know I'm on my way to the East Barn to give them a bucket of sweet feed ( a mixure of grains, molasses and vitamins) for breakfast. With all the rain this year, the nutritional value of the hay is low. Mostly it will provide carbohydrates to keep them warm. These heifers need good nutrition to develop into good mama cows, so about half of their feed ration for the day will be this sweet feed until they are back on spring pasture.
Grass fed is a nice idea, but a good herdsman looks out for his animals nutrition. If I was just raising what I call "dirty old feeder calves", that is just keeping cows to have calves that I sell in the fall, I might get by with just hay, no matter how bad the quality. Some years I'd have good calves, some years I wouldn't. I want to raise my animals the best way I can for their overall health and well being and this year that means some kind of nutritional supplement. If I didn't live in horse country, I could get by with alfalpha hay which has a higher protein content then other hays - its a legume, not a grass. Horse people seem to think their hay has to cost a lot to be any good (don't get me started) and so the cost of alfalpha hay around here is twice what it should be. If I can find rejected alfalpha hay (hay that might have a list dust or mold from all the rain) at a good price, I'll buy it quick enough and won't have to buy grain. Cows don't mind a little mold or dust. So far this year that's not happening.
On the west side of the property the new mama and calf are doing well. Bobby (last spring bull calf) and his mom are in with Cinnamon and her mom along with a two year old heifer who will hopefully calve in the spring. They share a bucket of the sweet feed each morning. The new mama needs plenty of protein and vitamins to make good milk for the calf, and Bobby the bull calf needs good nutrition to develop into a healthy, strong breeding bull.
The rest of the herd is on hay at present. They are still picking green pasture, so their nutrtion is good enough. When the cold is more pronounced and consistent, they too will get grain as well, about five pounds each a day - which is the equivalent of 10 pounds of hay. When the tempertures drops below freezing and stays that way, they will need as much as 30 pounds of hay or hay equivalent feed a day. I am constantly assessing the cost of hay and the cost of grain and balancing the two costs against the nutrition needs of the herd. Last year I fed no grain and the herd came through the winter just fine, but the hay was much better quality.
Wednesday, November 30, 2011
Monday, November 28, 2011

Rainy Days and Mondays - its all the same.
Another rainy Monday. We seem to be stuck on a weather pattern of rain on Mondays. It's so gloomy and dark. The chickens won't lay eggs hardly (just a couple a day) and the cows just want to hunker down and eat.
As I started to the mud room to suit up for my morning's outdoor chores, I found my sweet little timid kitty Nico (see his picture) peeing in my shoes - yes my shoes. He was very carefully squatting over one of them anyway. I yelled "No", grabbed him up and threw him out in the rain. Nico is very timid. He's a stray that was probably dumped as a kitten and maybe didn't get enough oxygen or something when he was born because he's not very bright. He's scared of all the other cats so I imagine he decided not to go to the basement litter box because my big yellow tom cat Tigger sleeps down there.
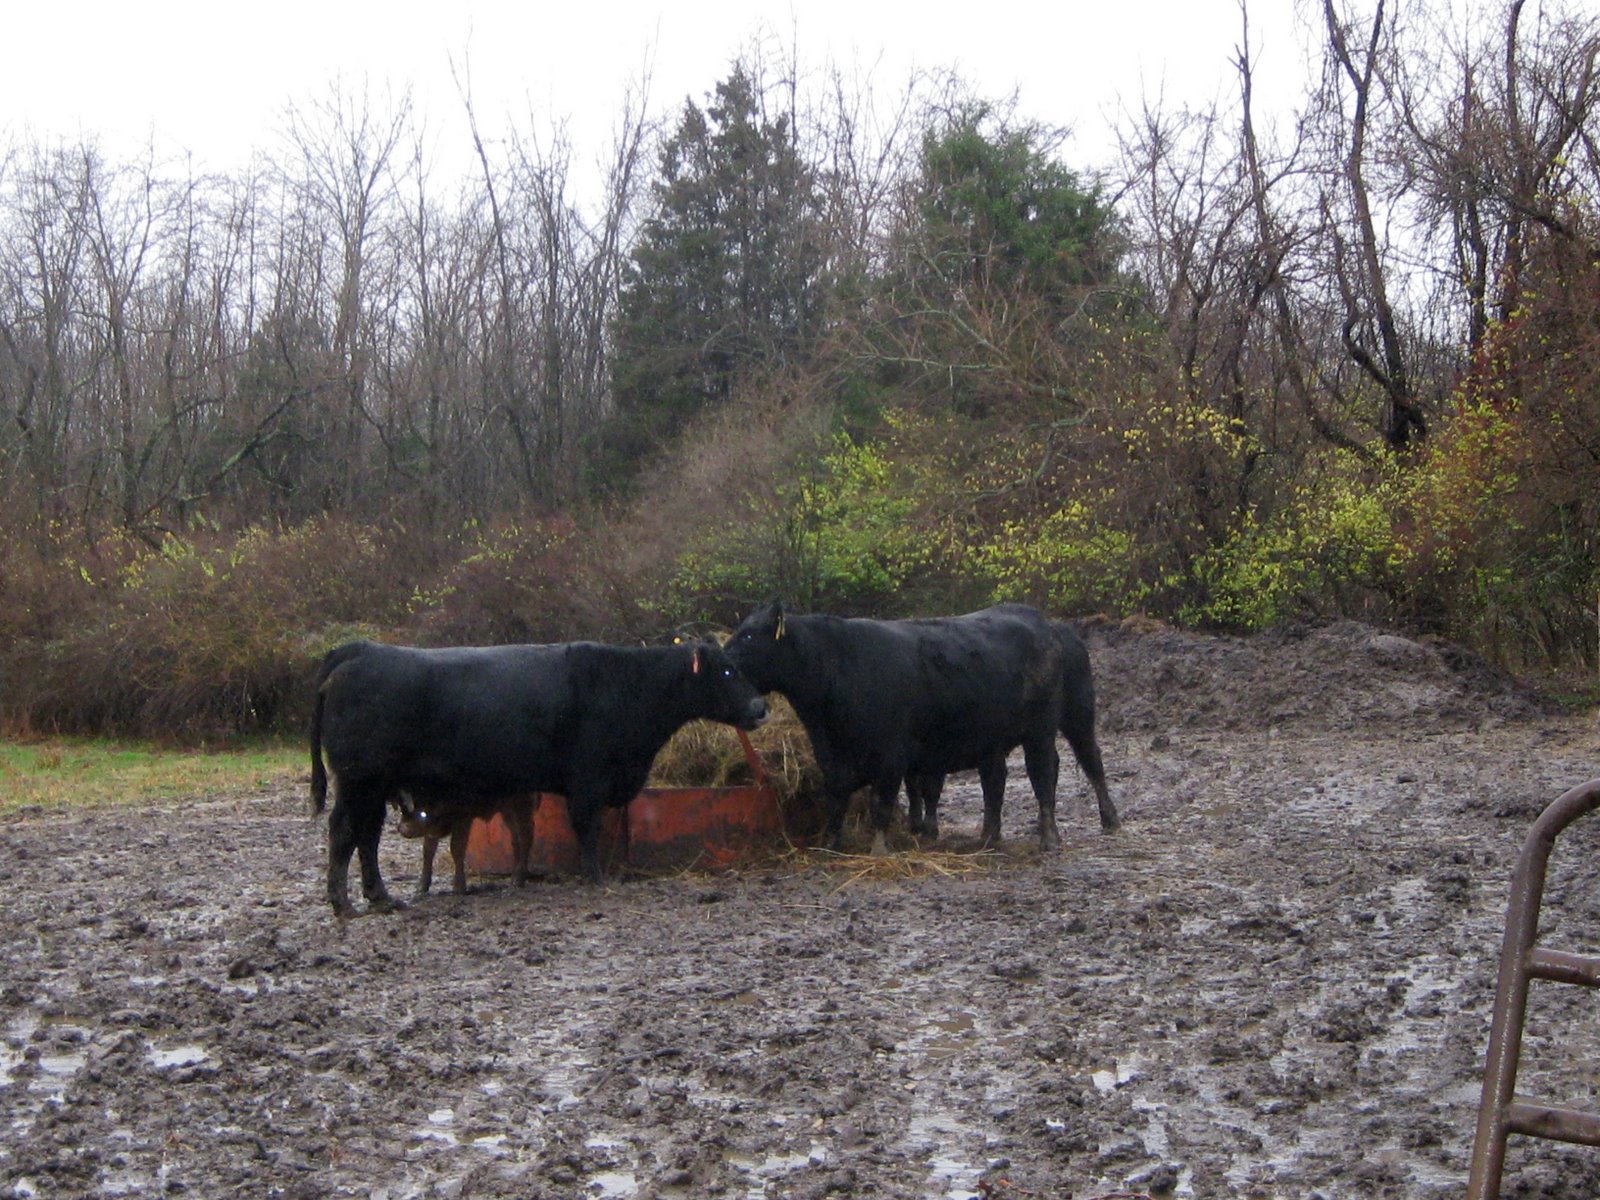
This past Saturday a friend with a Bobcat spent the afternoon (the only dry day of the weekend) cleaning out my round bale feeding pads. You can see in this picture behind the cows a big pile of dirt. As the cows pull the hay from the round bale they tend to drop some of it on the ground. Also, the outer layer of the bale is not very tasty so they leave that behind as well. This all mixes with manue and before you know it I'm kne deep in a mixture of hay and manure and mud. Next spring that will be the most wonderful garden compost anyone could want. Actually, I have three piles like that because I have three round bale feeding stations. Be sure and let me know if you need any compost!
If you look closely at the picture of the house you see a ladder laying on the sidewalk and notice a shutter is missing. That shutter has been down for months. The ladder has been there about a month as well. Every time I have time to get out there and put the shutter back on the house, it rains!!! The Farmer's Almanac predicts a wet winter and so far they are spot on!
As I started to the mud room to suit up for my morning's outdoor chores, I found my sweet little timid kitty Nico (see his picture) peeing in my shoes - yes my shoes. He was very carefully squatting over one of them anyway. I yelled "No", grabbed him up and threw him out in the rain. Nico is very timid. He's a stray that was probably dumped as a kitten and maybe didn't get enough oxygen or something when he was born because he's not very bright. He's scared of all the other cats so I imagine he decided not to go to the basement litter box because my big yellow tom cat Tigger sleeps down there.
This past Saturday a friend with a Bobcat spent the afternoon (the only dry day of the weekend) cleaning out my round bale feeding pads. You can see in this picture behind the cows a big pile of dirt. As the cows pull the hay from the round bale they tend to drop some of it on the ground. Also, the outer layer of the bale is not very tasty so they leave that behind as well. This all mixes with manue and before you know it I'm kne deep in a mixture of hay and manure and mud. Next spring that will be the most wonderful garden compost anyone could want. Actually, I have three piles like that because I have three round bale feeding stations. Be sure and let me know if you need any compost!
If you look closely at the picture of the house you see a ladder laying on the sidewalk and notice a shutter is missing. That shutter has been down for months. The ladder has been there about a month as well. Every time I have time to get out there and put the shutter back on the house, it rains!!! The Farmer's Almanac predicts a wet winter and so far they are spot on!
Sunday, November 27, 2011
Catching Up
It's been a busy week and weekend and December will just get even more busy. Christmas Festival and Horse Drawn Carriage Parade in town on Saturday and the museum is right in the middle of it all.
Thanksgiving was wonderful. The turkey was moist and delicious, thanks to my AGA, and I felt like the conductor of an orchestra with all the ovens going at the same time. As always we enjoyed the camaraderie of family getting together and entertaining each other. We all love to talk.
The little heifer calf has made it through its first week of life with most days being gloom and rain. Mom keeps her in the barn a lot. I've decided to call her Cinnamon.
Ghost hunts at Glendower are over. Booking January weekends for Harmon Hall. These are overnight stays - kind of like a ghost hunt slumber party for grown ups. Very limited number of people but very intense hunting.
Today I baked a second fruit cake. I just had to sample one of the first ones - and of course - its gone already. The family was all anxious to get their fruitcakes - but I've kept them behind for a little more Sherry and cure time. This new one is part store bought fruit, part home candied, so is more in the style of the cakes my Mom and sister and I used to bake Thanksgiving weekend in the old days. It's also baked in an angel food cake pan or tube pan which is also the way the original recipe tells you to bake it. It's much taller than the mini loaf pans so you get a deep, fruit studded slice when you cut into it. I'm going to cut this one into fourths and give each household a section of it as well. Should be interesting taste testing the two different cakes. I bet we all end up liking the new one just as well as the first one. After all, that's the cake we remember from growing up.
Wednesday, November 23, 2011
My AGA Cooker
I love English murder mystery novels and back in the early 1980's I was reading one that featured an AGA cooker. I was intrigued and went on the hunt to find out just what was an AGA cooker. That was before the Internet so I probably went to my public library to look it up, I really don't remember. But regardless, I was able to get enough information about the AGA, which is made in England, to decide I wanted one. Then I found out the price. Thirty years ago they cost $4000!
Flash forward to the late 1990's when we were living in Zionsville, Indiana and made friends with Johnna, the owner of the Keeping Room kitchen design store and an AGA dealer. Our little house in the country outside of town was not worthy of an AGA but when we decided to move back to the Cincinnati area and build a house, the AGA suddenly became possible. Since it is built on site, the AGA could become part of the mortgage, which was a good thing since by then the price on a full sized, four oven AGA had climbed to $14000.00!
The AGA was designed by a Nobel prize winning scientist who was forced to retire when he was injured in a lab accident. Once he was home full time he realized that his wife spent most of her day cooking their three meals. He set about to design a cooker, as they call ranges in England, that would save time. The AGA is the result.
My AGA is the four oven style, though you can purchase a two oven AGA. It is powered by propane and is on all the time. That is to say, the propane is always burning, heating each of the four ovens to different temperatures so that the AGA is always ready to cook. This is a great time saver and with four ovens and two big burners plus a warming bad, you can accomplish a lot of cooking all at once.
The good news is that the AGA also heats the kitchen to about 10 or 12 degrees warmer than the rest of the house. In my case the kitchen is the entire back half of the downstairs - its a kitchen/sitting room combination plus a powder room and mud room. I can shut doors closing the kitchen/sitting room off from the rest of the house and let the extra warmth from the AGA help to heat that back half. That way I can keep the thermostat (which is in the front of the house) set at 55 degrees all day while I am gone from home and the kitchen is still warm and comfy when I come home at night. I like a cool bedroom so I can just set the thermostat at 55 and forget it all winter (I have a down comforter and a heated mattress pad going most nights and a little high efficiency electric heater in the bathroom). It's amazing how much I save on electricity by keeping the furnace at that low temperature, not to mention propane!
When we built the house in 1998 propane was $.72 a gallon. My furnace, hot water heater and AGA are all powered by propane, which is now $2.09 a gallon but which has been as high as $3.00. The AGA drinks about a gallon a day, so its become rather expensive to operate, but I absolutely love my AGA and wouldn't give it up for anything. When I come down stairs in the morning the AGA is warm and cozy to stand by while I make my cafe au lait. I once read about an Irish country house hotel where the male owner of the house sat on the warming pad of their AGA each morning while his wife cooked his breakfast!
The warming pad is great for incubating yogurt and drying gloves and a variety of other uses. There is a roasting oven (400 to 500 degrees), a baking oven (300 to 375 degrees, a simmering oven ( 200 to 275degrees and a warming oven (140 degrees). I use the warming oven to dry corn, herbs, tomatoes, you name it. It's also great for keeping food warm! The burners are two big 12 inch steel pads. One is for boiling and the other for simmering. They are the perfect fit for canning kettles, and the boiling pad boils water in about 90 seconds. The simmering pad doubles as a griddle.
The first meal I cooked on my AGA was breakfast. Bacon and pancakes. On of the main things about an AGA is that you start things on the top of the stove and finish them in the oven, much like you see restaurant chefs cooking on television cooking shows. So, I put the bacon on a rack in the roasting oven while I cooked the pancakes on the griddle pad up top. In just a few minutes I had breakfast on the table. I was a little taken aback at first. We'd paid a lot of money for that stove and I expected to spend some quality time with it - but true to its designers intent, my cooking time was cut way back.
The ovens are cast iron and radiate the heat around the food on all sides. This gives fast even cooking. I'd never consider frying bacon on top of the AGA, its just too perfect and easy cooked in the oven. It also does a great job of frying onions (again in the oven). Pot roast and any kind of casserole comes out perfectly cooked each time - as long as I remember that its in the oven!! Because the AGA is vented to the outside via a stove pipe (remember, its a real cook stove, burning fuel all the time) and the ovens are well sealed, you don't smell the food cooking - unless you are outside. Many times I've walked out to the back yard for some reason, smelled the food in the AGA cooking and hurried back in the house to check on it.
I love my AGA!
Monday, November 21, 2011
Dried Sweet Corn for Thanksgiving
The family is coming to my house for Thanksgiving dinner. It's count down time to the big day. On Tuesday I'm picking up a fresh turkey my Mom ordered from Krogers. I'll cook the turkey, provide mashed potatoes and gravy and also dried sweet corn, a traditional family dish at Thanksgiving.
Most people around here don't seem to know about dried sweet corn, but it was a staple of the early pioneer diet and there was at least one dried corn factory in this area before the Civil War. It comes to my family through our Dutch side of the family via some Pennsvlvania German ancesters. If you travel north around Mansfield, Ohio and into the Amish country you can buy it in the grocery stores. You can also buy it on line, but that's expensive, and besides it very easy to dry sweet corn.
When I was a kid the sweet corn we grew was called Golden Cross Bantam. Golden Cross Bantam was a marvel when it was first introduced over 100 years ago. It's a yellow sweet corn with a good corn flavor, but like all earlier varieties, it's sugars turn to starch fairly quickly after picking. To keep that good sweet corn flavor you want to have the water boiling before you pick, which means you really need to grown your own. When the the super sweet corns were developed in the 1980's the starchy problem was greatly reduced. Now you can buy sweet corn at any farm stand or even corn shipped in from Tennessee or Florida and be reasonably sure of getting sweet, not starchy, corn.
To make dried sweet corn, cook a dozen good old fashioned ears of sweet corn in a pot of boiling, salted water for at least 10 minutes. Be sure and choose ears that you would be happy to eat fresh from the boiling water. Drain the ears and cool. With a sharp knife cut the kernals from the cob and lay them out in a single layer on a rimmed cookie sheet that's lined with foil, parchment paper or waxed paper with the waxed side down. Put the tray(s) of corn in a low 140 degree oven with the door cracked overnight or until the corn is completely dried and a golden nutty brown color. Cool and store in an air tight container. My grandmother stored her dried sweet corn in a cloth drawstring bag in her pantry and invariably it attracted little bugs. I store mine in plastic freezer bags and keep it in the freezer.
The probem with today's supersweet sweet corn varieties is that they are just too sweet. I've tried drying them but whatever gene keeps the sugars from forming into starch, also keep the sugars from developing the nutty color and flavor that is the flavor you want from dried sweet corn. One day I was tossing a bit of frozen corn from a bag of Birds Eye Frozen Yellow Sweet Corn - or some such thing - and noticed that the frozen store bought corn was really a good, corny flavored yellow sweet corn. In otherwords, frozen grocery store yellow sweet corn is NOT from super sweet varieties. I tried drying the rest of the frozen corn and it worked just fine. I just poured a bag of the still frozen corn on to a lined and rimmed baking sheet and dried it as usual. It took about 24 hours but the end product was very nearly the same as good old fashioned home grown, cooked, and dried sweet corn.
So, when I was too busy this summer to put up the electric fence in the garden and the racoons ate all my Golden Cross Bantam sweet corn, I just purchased a couple of bags of frozen corn and let it dry in to oven. Now I'm ready for Thanksgiving.
Cream Dried Sweet Corn
serves 8
2 cups dried sweet corn
4 cups water
1 teaspoon salt
2 tablespoons butter
1/2 to 1 cup of cream (your choice)
salt and pepper to taste
Early in the day or the day before you plan to serve it, in a 3 1/2 to 4 quart saucepan, combine the dried corn, the water and the salt. Bring to a boil and then lower the heat and simmer the corn for at least 1/2 an hour up to one hour checking now and then to see if more water is needed. The corn should be completely tender when its properly cooked and most of the water will be absorbed. At this point you can finish the dish with the butter and cream or store the cooked corn in the refrigerator until you are ready to serve. To finish the dish the next day, add the butter and cream and reheat the entire dish until the butter is melted and the corn mixture is steamy hot. Add salt and pepper to taste and serve. The end product is a sweet, nutty, corny dish that says Thanksgiving to everyone in our family.
Saturday, November 19, 2011
New Baby
All week long we've been on baby watch. One of the heifers has been due to calve and you just never know what's going to happen with first babies. The weather was so great last week and then this week was all cold and storms, not good calving weather. We've checked her every morning and evening, watching for all the signs. Yesterday the weather turned warm and dry again. Finally sometime in the early afternoon, she had her calf, all by herself with no problems. She picked a good spot on a high sunny south facing hill away from the herd so the pasture would be clean and dry.
Sunday, November 13, 2011
Fruitcake in Pictures


 Into the AGA to cook 3 hours.
Saturday, November 12, 2011
Christmas Fruitcake Recipe
I made my Christmas Fruitcake this morning. They are in the oven as I write this - they take about three hours to bake. The end product is six 4 inch by 7 inch mini-loaf pans. Here's the recipe:
Christmas White Fruitcake with Homemade Candied Fruit
12 oz blanched almonds chopped
2 cups of candied red cherries
Candied orange peel from four medium navel oranges, chopped
Candied lemon peel from two large lemons, chopped
2 Cups candied pineapple
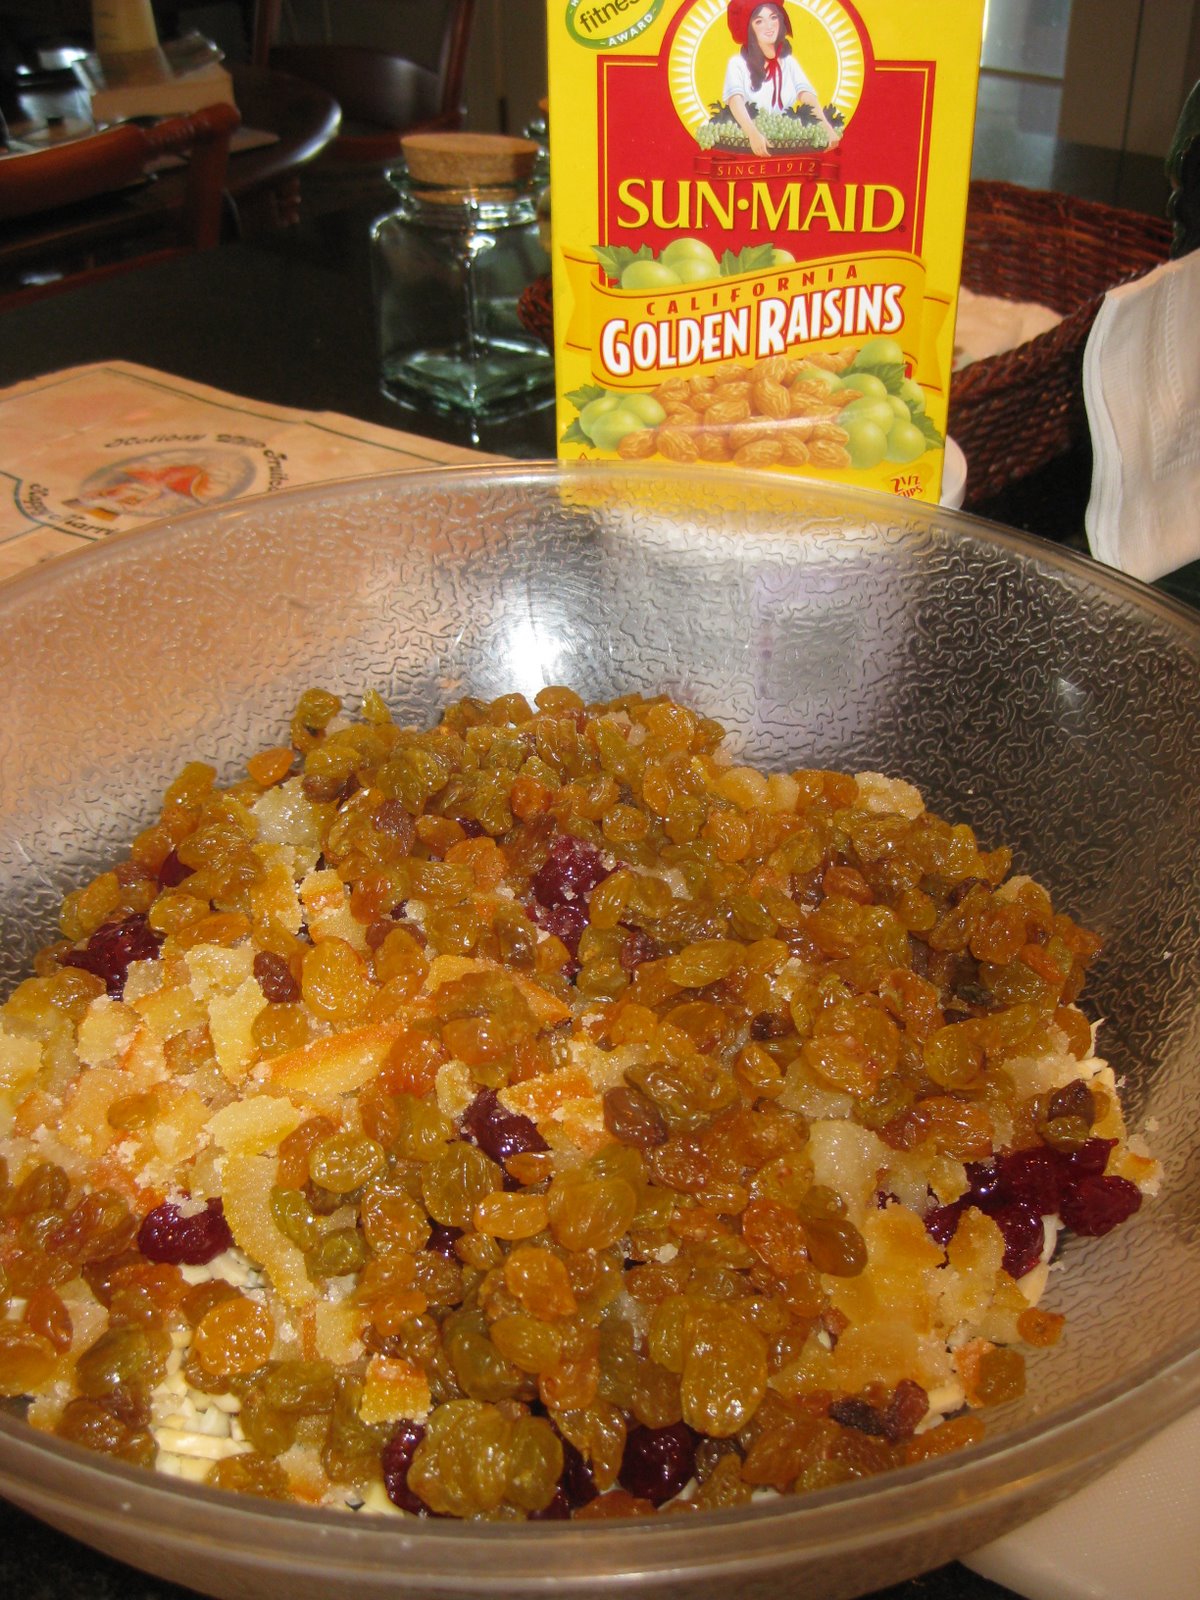
8 oz golden raisins
1/2 cup flour
Combine all the candied fruits, the almonds and the raisins in a large open bowl along with a 1/2 cup of flour. I chopped the almonds and the candied orange and lemon peel. I left the cherries and the pineapple whole. Mix all the fruit and nuts together to coat the fruit with the flour. I used my hands. Set aside.
2 1/4 sticks butter
1 1/2 cups of sugar
1/4 teaspoon salt
4 large eggs
1/2 cup whole milk
1/4 cup cream sherry
1 teaspoon almond extract
2 1/2 cups sifted all purpose flour
Sherry or Brandy for baked cakes
Make the white cake batter. In an electric stand mixer cream 2 1/4 sticks of butter. I used salted because I don't like to keep two kinds of butter in the house - too expensive. Next I added 1 1/2 cups of sugar, a 1/2 cup at a time and beat for five minutes on high, stopping the mixer halfway through and scraping down the sides.
When the butter and sugar mixture was light and fluffy I added 1/4 teaspoon of salt and then slowly beat in four eggs, one egg at a time. I broke each egg into a bowl and poured the egg into the mixture so I wouldn't have to worry about bits of egg shell getting in the batter. I used my fresh pasture raised eggs which turned the batter a bright yellow color.
Mix a 1/2 cup of milk with 1/4 cup cream sherry and a teaspoon of almond extract. Sift flour into measuring cups, measuring 2 1/2 cups of sifted flour. This is important. Don't just spoon the flour into cups and think its OK. Flour changes volume when sifted. So, sift the flour directly into the measuring cups. I put the flour in a separate bowl so I could add it a little at a time into the batter.
With the mixer running on low begin adding a fourth of the flour then alternate with one third or the milk mixture, ending with the flour. Beat until all is well combined, a couple of minutes.
Pour the batter over the fruit mixture and using a large wooden spoon, combine the fruit and batter until it is all well mixed. Distribute the batter among six mini loaf pans and bake in a 275 degree oven for three hours or until a tooth pick inserted in the middle of a cake comes out clean. Check cakes at two hours and turn them in the oven. Ovens vary and cake pans vary so three hours may be too long.
After cakes cool wrap them in several layers of cheese cloth or an old linen tea towel soaked in sherry or brandy. Put the cakes in air tight containers and store in a cool place (not a refrigerator) for at least four weeks. Once a week pour a little more sherry or brandy over the cakes. Serve with hot tea for a traditional Christmas treat.
Note: For years we made this fruit cake with the candied fruit you buy at the grocery and we loved it. So don't think you have to candy your own. It's just that the cake is so incredibly much better with home candied fruit.
Friday, November 11, 2011
Stuffing vs Dressing
This is the time of year when all the woman's interest magazines are full of recipes for Thanksgiving dinner. This year there seems to be more stuffing recipes than usual, and most of them aren't stuffing at all but dressing. That makes me wonder if what we call dressing -that savory bread pudding that's baked in a casserole inside the oven and not the turkey, is something common only to southern Ohio. We always call a bread mixture stuffed inside a bird stuffing and the casserole version, dressing. I'm pretty sure the menu at the Golden Lamb Inn calls it turkey and dressing.
In our house we don't bother with stuffing - never enough room in the bird for enough to feed all of us. We always make dressing on the side; lots of it. We love it Thanksgiving Day and left over for days after. Nothing better. My mother's recipe is pretty simple. Diced onion, diced celery, dried unseasoned bread cubes, chicken broth made from simmering the neck and gizzard, maybe a little extra chicken broth form "stock in a box" , a little poultry seasoning and lots of salt and pepper. It's baked in a big casserole dish and has a crusty bottom and top and soft, moist center. We like to pour lots of turkey gravy over the dressing.
When I make it I sometimes add a little fresh chopped parsley and some pecans. Cran raisens are also a nice addition. Regardless, dressing is always a favorite on Thanksgiving.
Wednesday, November 9, 2011
New Slaughter Date
Well, its official. I have a new butcher and a new slaughter date for my beef steer. The new butcher was recommended to me by three different people who know about such things. The butcher is located in Medway, Ohio and will vacuum seal the meat - which is something I've heard is the very best way to keep freezer beef.
I've decided I am not going to call him by name anymore, its just too difficult. But I am happy to have found him a good private butcher who will treat him with care and respect. Otherwise, I would have been forced to ship him to the sale barn and you know what happens to those animals - yep - they go to the big packers and who knows what happens to them there. So, my steer will have his last day December 15 and be home in my freezer some time between Christmas and New Years.
I've pre-sold most of the meat so the proceeds from the sale will be used to pay my real estate taxes and buy hay for his mother and sister. It's a good thing.
Tuesday, November 8, 2011
Fruitcake on the Way!
I finished the candied red tart cherries this past weekend. Now I have all the candied fruits made and this weekend will be fruit cake baking time! I'll give you the recipe then.
I decided against the maple syrup gingerbread and decided to go with an apple crisp with ice cream for the Monday night family dinner dessert. I went to Irons Fruit Farm and picked up a collection of seven different apples. I should have paid more attention to the types of apples, not just how they looked. The crisp was good, but some of the apples stayed firm and I really wanted them to cook down and be soft. The flavor was there, but next time I'll go with Golden Delicious and not play with my food so much.
I decided against the maple syrup gingerbread and decided to go with an apple crisp with ice cream for the Monday night family dinner dessert. I went to Irons Fruit Farm and picked up a collection of seven different apples. I should have paid more attention to the types of apples, not just how they looked. The crisp was good, but some of the apples stayed firm and I really wanted them to cook down and be soft. The flavor was there, but next time I'll go with Golden Delicious and not play with my food so much.
Saturday, November 5, 2011
Candied Orange Peel
I made candied orange peel this morning while I waited for the plumber to come and install new kitchen facets. Homemade candied orange peel is just one of the best things ever. It has no relationship to that candied orange peel you buy in the grocery. I made it just like I made the lemon peel - which I had to make over because I ate all of the first batch - not in one sitting, but over time. It's such a great little bit to eat at the end of a meal as a palate cleanser - and it tastes so good! It's so easy to make and you get to eat the oranges as well. With the lemons I squeezed the juice and froze it in ice cube trays. I love oranges so I just wrapped their little naked selves in plastic wrap and enjoyed them over the course of a couple of days. Yum!
Hopefully, tomorrow I get started on candying the sour cherries and then its time to bake the fruit cake! I finished the pineapple last weekend before we neutered the cats. You can't believe what a huge difference it makes to use home candied fruits to make fruit cake. The only purchased fruit I will use will be golden raisins. You also can't imagine what a huge difference it makes to have the cats neutered.
I'm also busy digging up a space to plant some red raspberry starts my brother is giving me. I'm trading him several truck loads of good compost. I have some high gravely ground in the garden that has been nothing but weeds for several years, and should be great for the raspberries. My brother and his wife have the most wonderful crops of red raspberries you can imagine and my sister-in-law makes a fantastic red raspberry pie at least once in the season. She says she makes it just like strawberry pie. I think it tastes even better than strawberry pie.
Friday, November 4, 2011
Gingerbread
Gingerbread is one of my favorite things this time of year. It's one of my assistant curator's birthday's today - Happy Birthday Lynley - so I decided to make gingerbread cupcakes with cream cheese frosting to take for our lunch celebration. I checked out a couple of recipes and finally chose one in my good old Fanny Farmer cookbook that gave instructions for baking in a muffin tin. For the first time ever, Fanny failed me!
It's not that the cupcakes are bad, they just aren't as good as I'd like them to be. For one thing, the spices are too strong and the cake itself is too dense. I'm not even that crazy about the cream cheese frosting. I'll take them in anyway, with apologies. But there you are.
I should have baked my favorite gingerbread recipe, but it calls for 1 cup of maple syrup and I didn't have that much of the real thing left - and I don't keep the fake stuff. It's my turn to make dessert for the family Monday night dinner, so I've made up my mind to get more maple syrup and bake the following recipe:
Maple Syrup Gingerbread
from
"The Best of Shaker Cooking"
by Amy Bess Miller and Persis Fuller
copyright 1970 by Shaker Community, Inc.
From Hancock Shaker Village
1 cup maple syrup
1 cup sour cream
1 egg, well beaten
2 1/3 cups all purpose flour
1 3/4 teaspoons baking soda
1 1/2 teaspoons ginger
1/2 teaspoon salt
4 tablespoons melted butter
Combine the maple syrup, sour cream and egg. mix well. Sift all the dry ingredients and stir into the liquid, beating well. Add butter and beat thoroughly. Pour into a well-buttered nine inch square baking pan. Bake in a moderate 350 degree oven for 30 minutes or until tooth pick inserted in center of cake comes out clean.
Serve with whipped cream. If you can find it, sprinkle with shaved bits of maple sugar.
This makes a light flavored cake, not at all dark and spicy like some gingerbreads which usually have molasses in place of the maple syrup. Good enough for company.
"Put your hands to work
and your hearts to God,
and benefits will befall thee."
Mother Ann Lee, founder of the Shakers
or
The United Society of Believers in Christ's Second Appearing
Thursday, November 3, 2011
No Beef Today
I have a steer named Butterscotch who was meant to be an ox. That is to say, I had planned to train him to be an ox that pulled a cart. He has a good nature and I thought that would be fun. Then my husband left me and life feel apart for a while and Butterscotch did not get his ox training.
It costs about $400 a year to keep a beef animal, so it just doesn't make sense to keep Butterscotch in the herd, munching grass and hay and grain and not producing anything (steers are neutered males). So, six months ago I made a date with the butcher for Butterscotch. Last month I called and confirmed the date with the butcher and took orders for his meat. My own freezer is basically empty of beef and I've been looking forward to filling it.
He was supposed to go to the butcher today. Monday I received a voice mail saying that the butcher would not be able to slaughter my steer after all and if I had questions to call. I've called everyday this week and left a message on their answering machine, but no one calls me back. I have a bad feeling that something bad has happened to the butcher. I hope not, but you never know. They all seemed fine last month when I called.
There are other good private butchers in the area, but they are all busy with all kinds of slaughters - especially deer. Butterscotch is leading a charmed life for sure. He's back on pasture now and there he will stay until I get another date for his demise - which needs to be soon - he's a big boy and eats lots.
Subscribe to:
Posts (Atom)